oosVersion 2.1
Account Management
Overview of OOS account management, including adding, editing, and deleting accounts, alongside permission matrices.
OOS allows administrators to create different types of user accounts. Currently, Admin and Container privilege levels are supported.
Account Privilege Matrix
| Function Category | Admin Privilege | Container Privilege |
|---|---|---|
| Networking (Forwarding; Mobile Network; Wi-Fi; WAN; LAN) | Yes | No |
| Application | Yes | Yes |
| Logs | Yes | Yes |
| Security (Authentication; Firewall; Access Control) | Yes | No |
| Diagnose | Yes | Yes |
| Scheduler | Yes | Yes |
| Settings (General; Alert; SNMP; iSCSI Initiator; Remote Help) | Yes | No |
Adding an Account
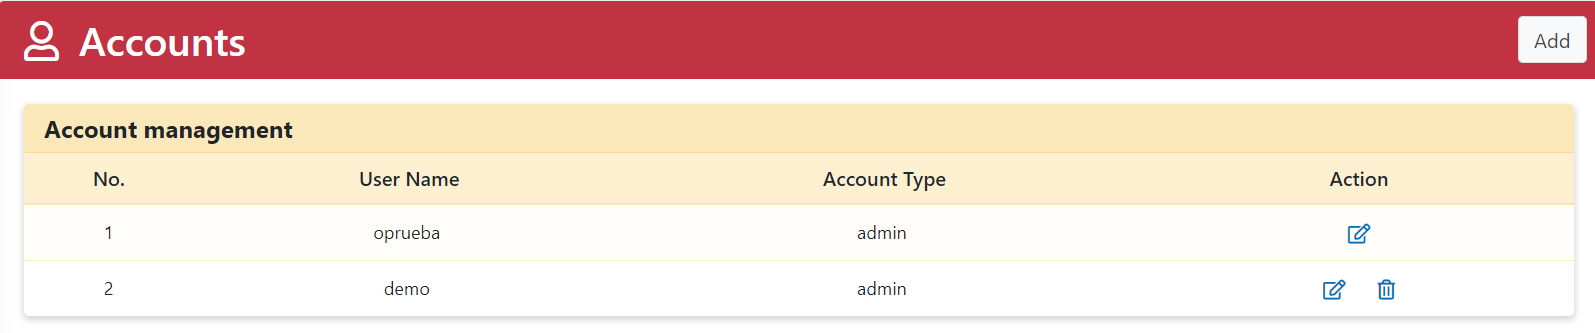
- Step 1: Go to the Accounts page.
- Step 2: Click the "Add" button.
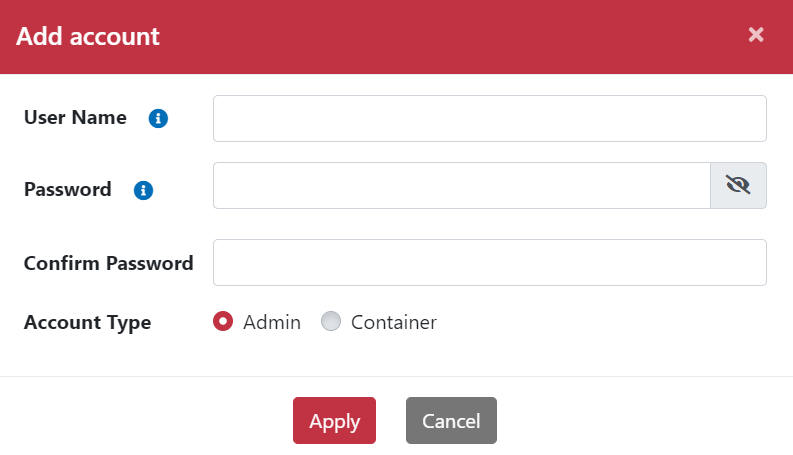
- Step 3: The "Add Account" dialog box will pop up.
- Step 4: Enter User Name, Password, and Confirm Password.
- Step 5: Select the Account Type as Admin or Container.
- Step 6: Click the "Apply" button.
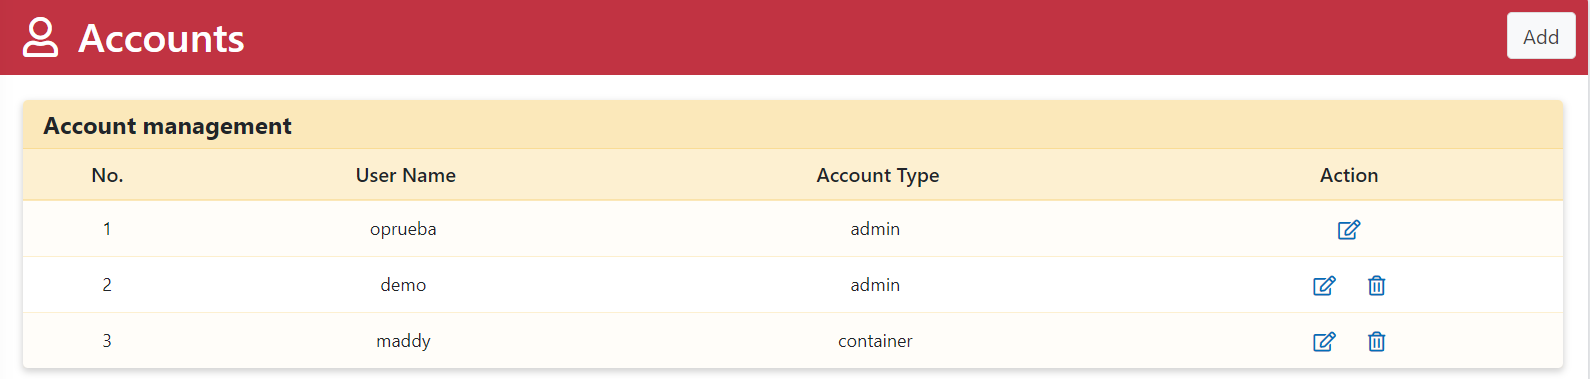
- Step 7: Return to the Accounts page.
- Step 8: The newly added account will appear in the Account Management table.
Account Naming and Password Rules
| Field | Rule Description |
|---|---|
| User Name | Must be 2–32 characters long. The first character must be a lowercase letter; subsequent characters can be lowercase letters, numbers, underscores (_), or dashes (-). |
| Password | Must be 8–64 characters long. Backslashes (\) are not allowed. |
Editing an Account
- Step 1: Go to the Accounts page.
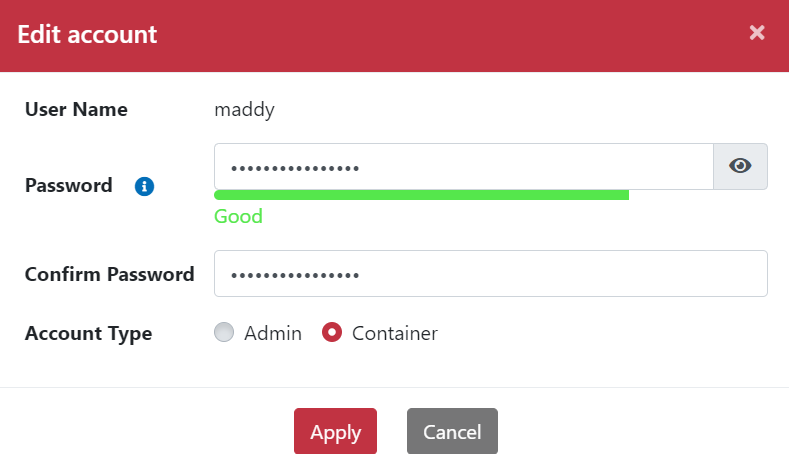
- Step 2: Click the "Edit" icon next to the account to open the "Edit Account" dialog box.
- Step 3: Modify the password or account type.
- Step 4: Click the "Apply" button.
- Step 5: Return to the Accounts page.
- Step 6: Click the "Logout" button.
- Step 7: A confirmation dialog box will pop up asking if you are sure you want to log out.
- Step 8: Click the "Yes" button.
- Step 9: Return to the Login page.
- Step 10: Enter your username and the new password.
- Step 11: Click the "Login" button.
- Step 12: Successfully log in with the new password.
Deleting an Account
- Step 1: Go to the Accounts page.
- Step 2: Click the "Delete" icon next to the account.
- Step 3: A confirmation dialog box will ask if you are sure you want to delete the account.
- Step 4: Click the "Yes" button.
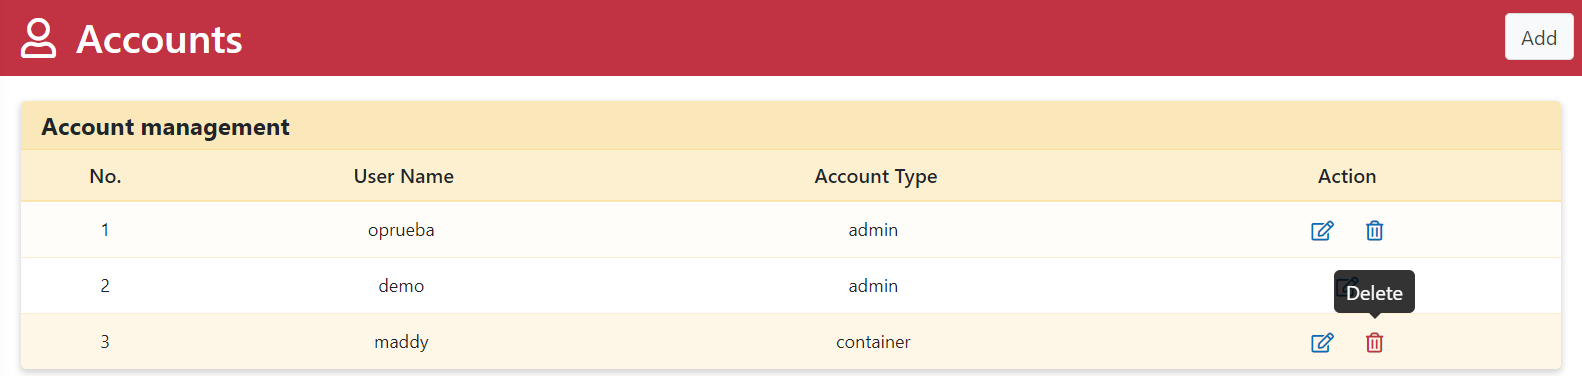
- Step 5: The account is deleted successfully.
- Step 6: The Account Management table no longer displays the deleted account.