Active-Backup WAN
Active-Backup WAN setup guide
This use case provides a step-by-step guide for setting up a Multiple WAN scenario designed for two groups to access the Internet using different WAN services.
- Group 1: Users and devices access the Internet through WAN interfaces (eth2 and eth5) using VLAN 1's LAN and Wi-Fi SSID.
- Group 2: Users and devices access the Internet through WAN interfaces (Mobile Network-internet and eth6) using VLAN 10's LAN and Wi-Fi SSID.
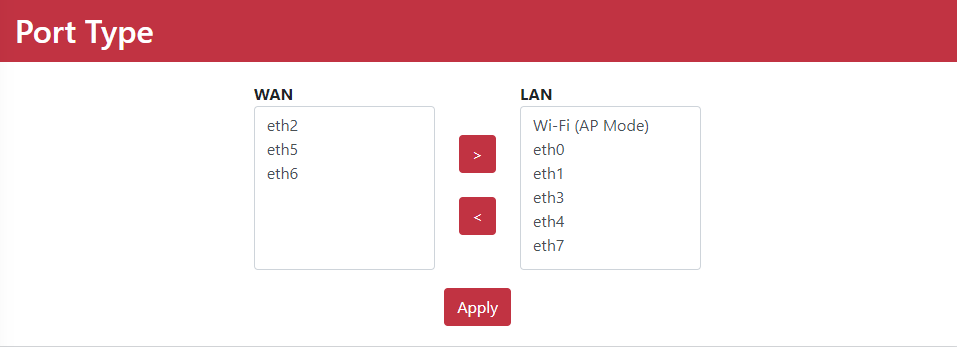
1. Setup Port Type as WAN
Configure WAN ports to allow users and devices to access the Internet.
- Step 1: Go to Networking > Forwarding > Port Type.
- Step 2: Change the port type of eth5 and eth6 from LAN to WAN.
- Step 3: Click Apply.
2. Multiple WAN Status Verification
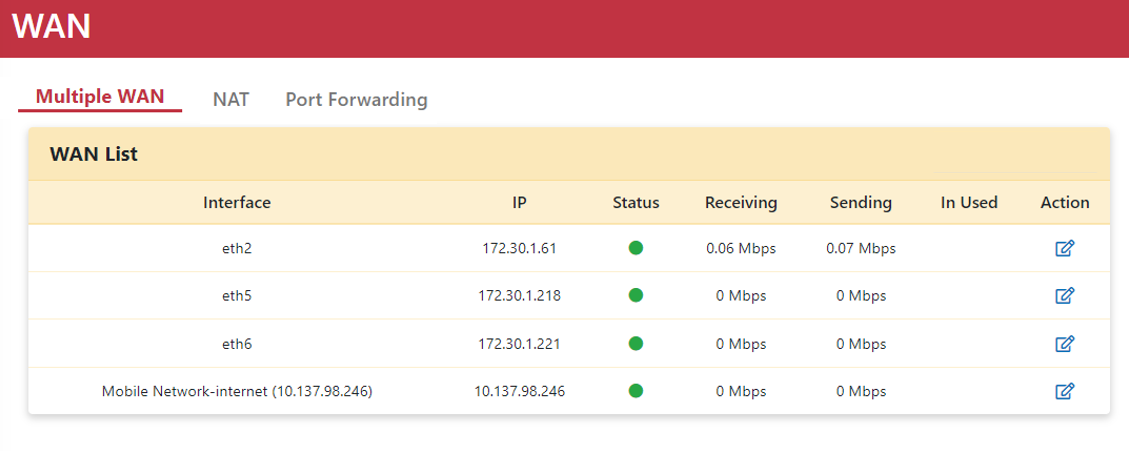
The WAN List displays real-time WAN connection status, including Connected and Disconnected states.
- Step 1: Go to Networking > WAN > Multiple WAN.
- Step 2: Verify that eth5 and eth6 obtain IP addresses automatically via DHCP.
- Step 3: Confirm that eth5 and eth6 show Connected (green) status.
3. Create VLAN
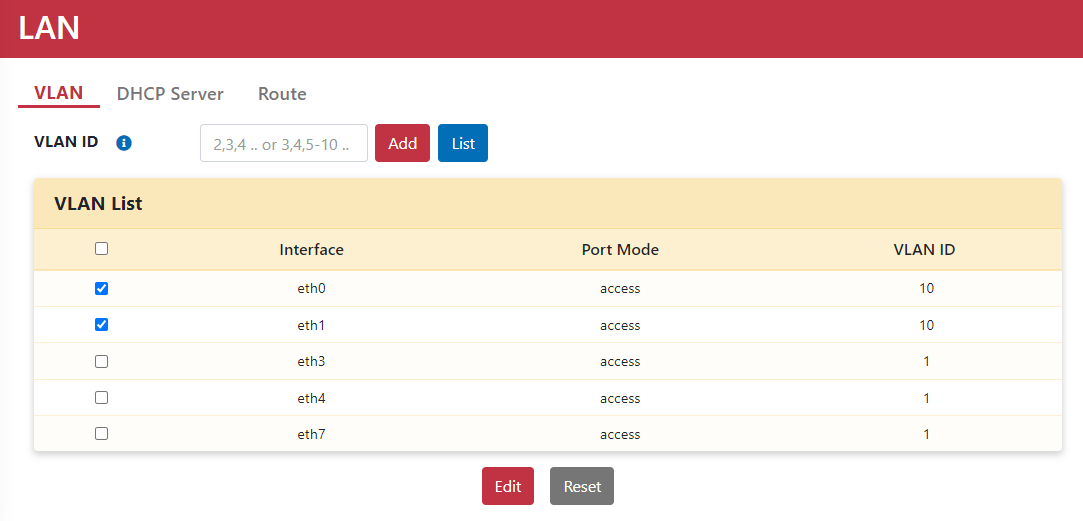
Create a VLAN to configure separate LAN network segments.
- Step 1: Go to Networking > LAN > VLAN.
- Step 2: Add VLAN ID
10. - Step 3: Click Add.

- Step 4: Select eth0 and eth1 in the VLAN Table.
- Step 5: Click Edit to open the Edit VLAN Mode dialog box.
- Step 6: Set Port Mode to Access and VLAN ID to
10. - Step 7: Click Apply.
4. Create DHCP Server by VLAN
Ensure users and devices in different LAN segments receive IP addresses automatically via DHCP.
- Step 1: Go to Networking > LAN > DHCP Server.
- Step 2: Click Add to open the Add DHCP Server dialog box.
- Step 3: Select VLAN ID
10. - Step 4: Enter a Description.
- Step 5: Enter the Gateway & Management IP.
- Step 6: Enter the Netmask.
- Step 7: Enable DHCP Server: ON.
- Step 8: Specify the Address ranges.
- Step 9: Select None or specify the Maximum lease time.
- Step 10: Enter the DNS server addresses.
- Step 11: Click Apply.
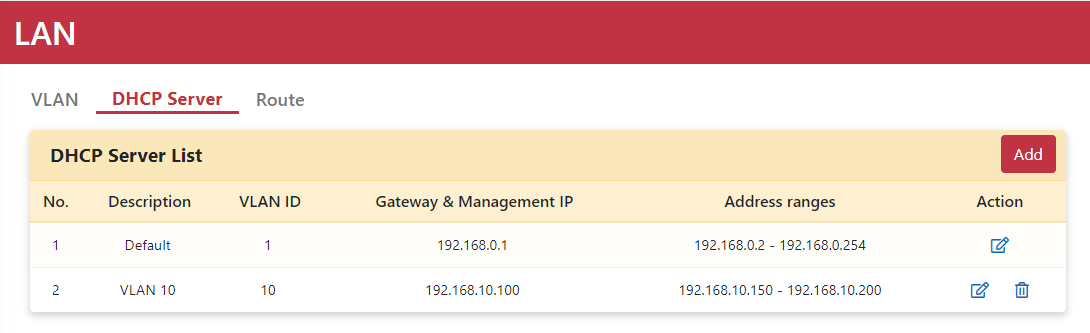
5. Bind Multiple SSIDs to DHCP Server
Allow Wi-Fi users and devices to obtain IP addresses automatically via the designated DHCP server.
- Step 1: Go to Networking > Wi-Fi.
- Step 2: Click Setting to open the Setting dialog box.
- Step 3: Enter the SSID, select WPA-2 authentication, and specify the VID.
- Step 4: Toggle the SSID to ON.
- Step 5: Click Apply.
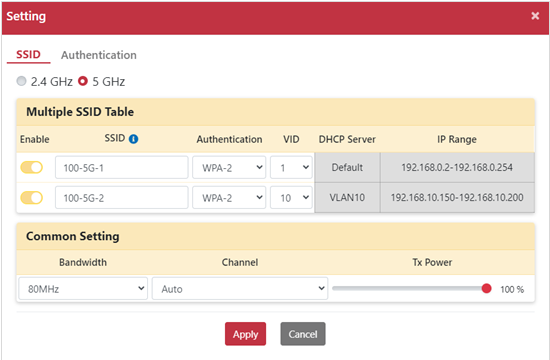
6. Bind WAN and Setup WAN Priority for VLAN 10
Bind WAN interfaces and configure failover priority for VLAN 10.
- Step 1: Go to Networking > Forwarding > WAN Binding.
- Step 2: Click the Bind icon for VLAN 10 to open the WAN Binding dialog box.
- Step 3: Move Mobile Network-internet and eth6 from Available WAN to In Used WAN.
- Step 4: Click Apply.
- Step 5: Click the Edit icon for VLAN 10 to open the Failover dialog box.
- Step 6: Set 1st WAN priority to eth6.
- Step 7: Set 2nd WAN priority to Mobile Network-internet.
- Step 8: Set Detection Mode to Latency.
- Step 9: Set Threshold Latency to greater than 1 second, and Detection Period to 1 second.
- Step 10: Set Failback to ON.
- Step 11: Click Apply.
7. Bind WAN and Setup WAN Priority for VLAN 1
Bind WAN interfaces and configure failover priority for VLAN 1.
- Step 1: Go to Networking > Forwarding > WAN Binding.
- Step 2: Click the Bind icon for VLAN 1 to open the WAN Binding dialog box.
- Step 3: Select Active-Backup Mode and move eth2 and eth5 from Available WAN to In Used WAN.
- Step 4: Click Apply.
- Step 5: Click the Edit icon for VLAN 1 to open the Failover dialog box.
- Step 6: Set 1st WAN priority to eth2.
- Step 7: Set 2nd WAN priority to eth5.
- Step 8: Set Detection Mode to Latency.
- Step 9: Set Threshold Latency to greater than 1 second, and Detection Period to 1 second.
- Step 10: Set Failback to ON.
- Step 11: Click Apply.
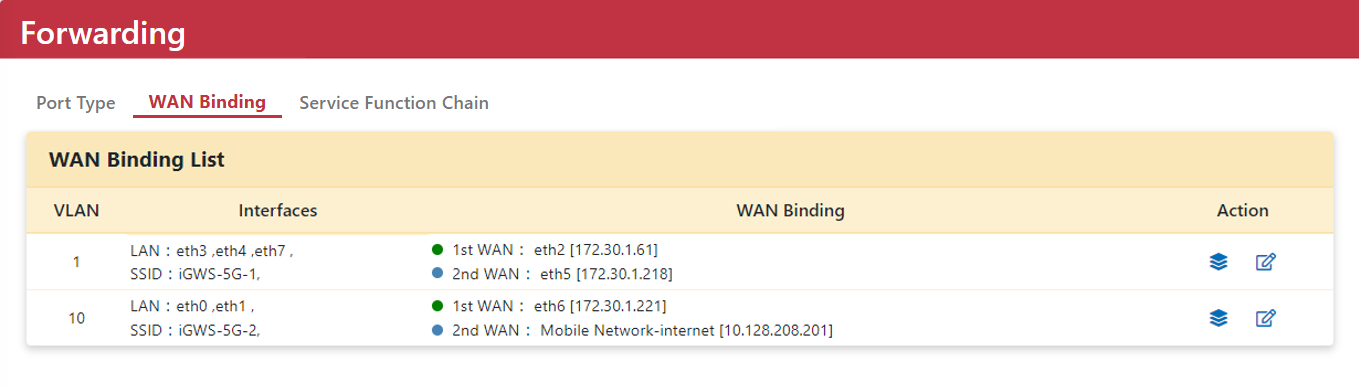
8. Link Status Topology and Information
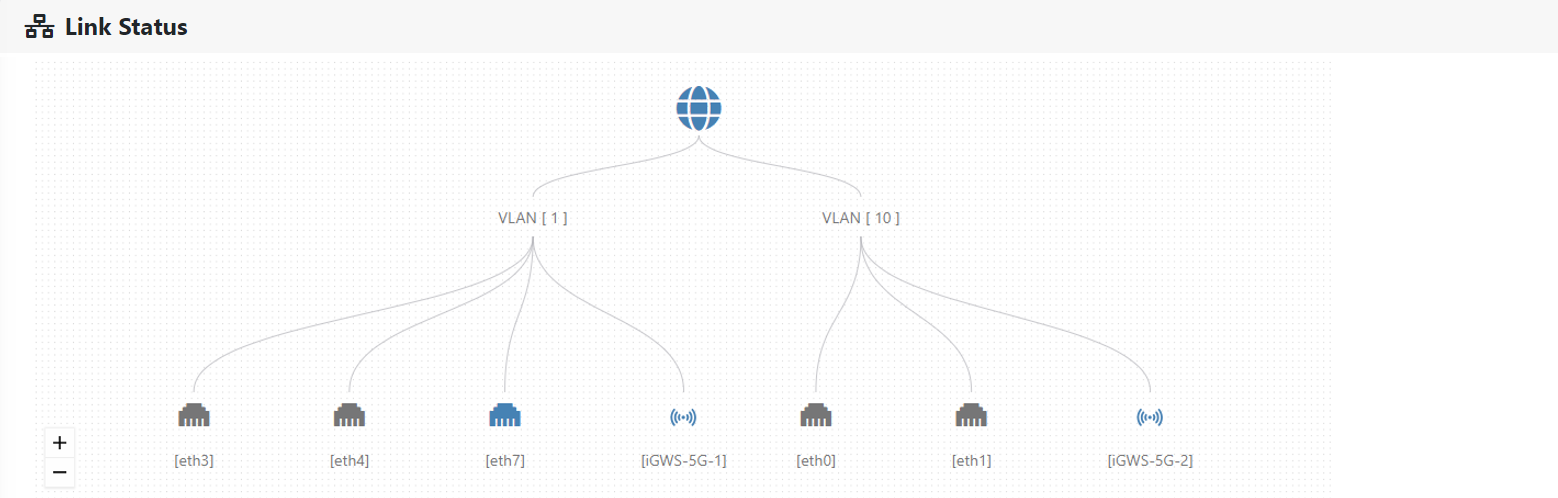
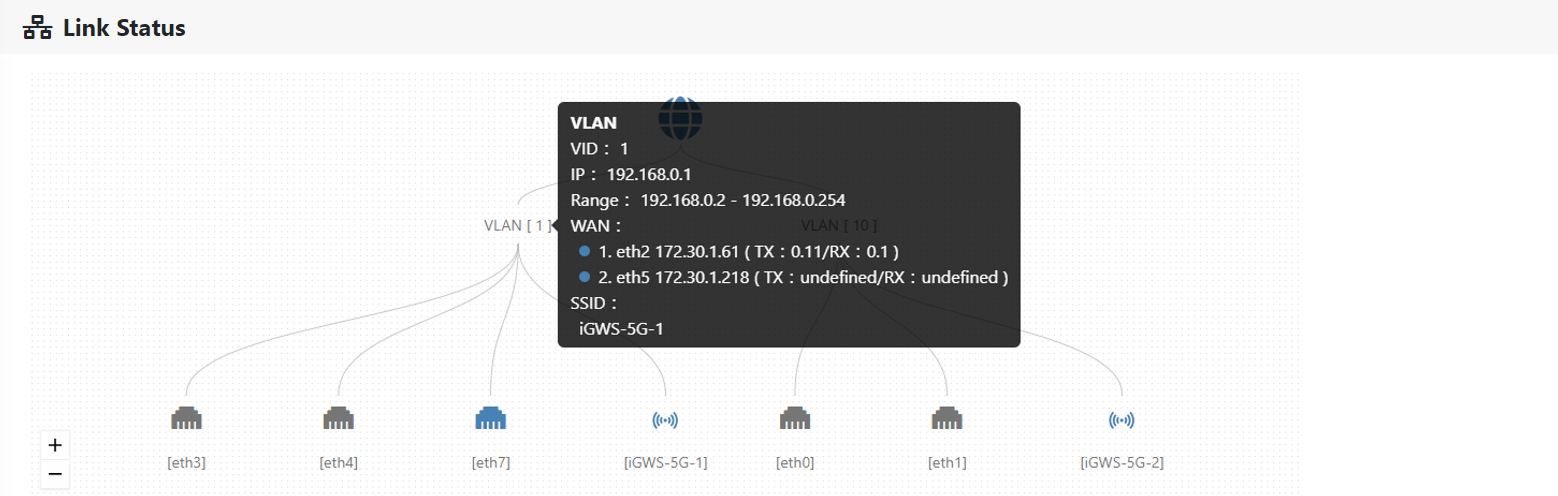
Hover your mouse cursor over VLAN 1 to display detailed information regarding VLAN, WAN, and SSID configuration.